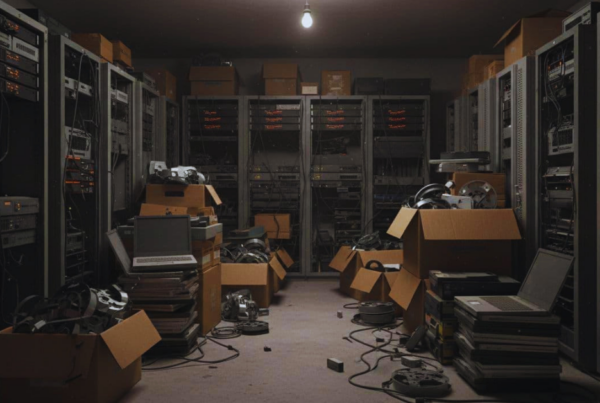


From exam rooms and imaging suites to nurse stations, data closets, and server rooms, old tech piles up fast. In healthcare, e-waste disposal isn’t just an environmental concern, it can also put patient privacy at risk.
IT and compliance teams feel the squeeze because timelines are tight, audits pop up, and vendor risk is real. Without a clear chain of custody, even a “retired” laptop, monitor, or server can turn into a headache.
This Washington focused guide breaks down what HIPAA expects when devices leave your control, when wiping is enough versus when destruction makes more sense, and what paperwork matters (like certificates and pickup records). You’ll also get a repeatable program you can run site to site, with a practical nod to Living Green Technology (LGT), Seattle area healthcare e-waste experts, so disposal stays simple, secure, and provable.
What counts as healthcare e-waste in Washington, and what data risks hide inside it
In a Washington healthcare facility, e-waste is more than broken computers in a bin. It’s any retired, replaced, or surplus device that can store, cache, sync, or transmit patient or employee data. That includes obvious IT gear and the not-so-obvious clinical tools that quietly keep logs in the background.
The tricky part is how spread out this equipment is. A single health system can have hundreds of mini tech zones, exam rooms, nurse stations, labs, imaging, billing, telehealth closets, and offsite clinics. As a result, privacy risk doesn’t stay in the server room. It follows the device, wherever it lives.
A quick map of devices, from exam rooms to server rooms
Most healthcare e-waste falls into a few buckets. Start with what staff touch every day, then work back to the infrastructure that keeps it all running.
Endpoint devices (daily users):
These are common because they refresh often and move around.
- PCs at nurse stations, front desks, and medication rooms
- Laptops for providers, care managers, and on-call teams
- Tablets used for rounding, check-in, or consent forms
- Mobile phones used for secure messaging, photos, and MFA apps
Clinical devices (care delivery tools):
Even when they “aren’t computers,” many contain embedded storage, service logs, or settings that include user IDs and timestamps.
- Patient monitors and bedside telemetry units
- Infusion pumps and programming modules
- Ultrasound accessories (portable consoles, probes with paired control units, carts)
- EKG carts and stress test systems
Imaging and specialty gear (heavy systems with lots of data paths):
Imaging areas often have a mix of medical devices and standard PCs that handle viewing, routing, and printing.
- Radiology workstations and reading room PCs
- Control room PCs attached to scanners and specialty systems
- Modality-adjacent parts (operator consoles, interface boxes, dictation stations)
Network and back office (the “plumbing”):
These may store configs, credentials, or logs that reveal users, IPs, and network structure.
- Switches, routers, and wireless access points
- Firewalls and VPN appliances
- VoIP phones and call manager hardware
- Time clocks, badge systems, and door controllers
Data center assets (where old data hides the longest):
These devices tend to hold the most volume, and they often contain old snapshots that no one remembers.
- Servers (virtual hosts, app servers, domain controllers)
- Storage arrays and SAN/NAS systems
- Backup tapes, removable cartridges, and archive media
- External hard drives used for transfers or “temporary” backups
Don’t forget the small stuff. SD cards, USB drives, badge readers, and docking stations can store identifiers, photos, access tokens, or sync traces. In healthcare, a tiny accessory can carry the same risk as a desktop tower.
If a device ever touched patient care, scheduling, billing, imaging, or communications, treat it like it might contain PHI until you prove it doesn’t.
Where protected information can live, even when you think it does not
PHI doesn’t only live in the EHR database. It spreads like glitter. A name here, a photo there, a login token somewhere else, then it sticks around after a device “stops being used.”
Here are common places protected data ends up, in plain language:
- Local caches and temp files: Apps save snippets to load faster. That can include patient lists, visit notes, or thumbnails of images.
- Print queues and scan folders: Multi-function printers and copiers can store recent jobs. Scanned documents may sit in a folder on the device or a connected PC.
- Browser sessions: Patient portals, web-based EHR tools, and insurance sites can leave saved passwords, cookies, and autofill data.
- EHR sync folders: Some workflows export PDFs, CCDs, or reports to a local folder for faxing, uploading, or chart prep.
- Remote management tools: IT agents can store device names, user info, installed apps, and remote session logs.
- Call recordings and voicemail: Contact centers and clinic phones may keep recordings, transcripts, or caller IDs longer than expected.
- Device logs and service menus: Clinical devices often track events, alarms, patient IDs, or operator IDs for troubleshooting.
Two “easy to miss” areas cause repeat problems: nurse station terminals (because many users rotate through them) and portable media (because it walks off). Multi-function printers deserve special attention too, since they behave like computers with a hard drive.
Before you approve e-waste pickup or resale, slow down and ask a few direct questions. A simple gut check catches most surprises:
- Did it store names, MRNs, images, messages, or credentials?
- Could it be paired to another system (Wi-Fi, Bluetooth, badge access, EHR tools)?
- Did it ever connect to your network, even for a short time?
If you can’t answer confidently, assume there’s risk and handle it like sensitive media. In other words, treat disposal like you would treat a chart. The device may look empty, but the leftovers are often still inside.
HIPAA scope for device disposal, what you must do, and what auditors expect to see
HIPAA shows up in e-waste decisions sooner than most teams think. The moment a device might hold PHI (or the keys to reach it, like saved passwords or VPN tokens), disposal becomes a privacy control, not a housekeeping task. In plain terms, your job is to make PHI unreadable and unrecoverable, and then prove you did it.
Auditors usually look for three things: a clear policy, a repeatable process, and records that connect each asset to a final outcome. That means your risk analysis, workforce training, and vendor management need to line up with what happens in the loading dock and at the recycler.
When HIPAA follows the device, and what safe disposal means in plain language
A device is in scope when there’s any chance it contains PHI, or anything that can grant access to it. That includes more than hard drives. Think cached patient lists, scanned PDFs, photos, voicemail, browser sessions, EHR sync folders, and remote access tools. Also treat credentials and configs as sensitive, because they can open doors even when the device looks “empty.”
Safe disposal has two acceptable end states:
- Verified sanitization: You wipe the storage using a documented, tested method and you can show the results.
- Verified destruction: You physically destroy the media so data can’t be recovered.
What doesn’t count? In many cases, dragging files to the trash, “quick formatting,” or a factory reset. Those steps often leave recoverable data behind, especially on older drives, some SSDs, copiers, and embedded clinical gear.
Chain of custody matters because HIPAA risk spikes when devices leave your control. Picture a sealed specimen bag. If the seal breaks with no explanation, trust evaporates. Device disposal works the same way. From pickup to final processing, you want a documented handoff trail that answers: Who had it, when, and where did it go next?
To make this repeatable, tie disposal to your program basics:
- Policies: Define when to sanitize vs destroy, and who approves exceptions.
- Risk analysis: Classify assets (endpoints, servers, copiers, clinical devices) and set default handling.
- Workforce training: Teach staff what “in scope” means and how to tag, store, and release devices.
- Vendor management: Use a vetted recycler, with a Business Associate Agreement (BAA) when PHI is involved, plus clear downstream controls.
If you can’t prove a device was wiped or destroyed, assume it wasn’t. Auditors think that way, and so should your process.
In Washington, many organizations look for HIPAA compliant electronics recycling Seattle providers that can support secure pickup, tracking, and documented outcomes across multiple sites.
Documentation that holds up in an audit, including certificates and chain of custody
In an audit, confidence comes from paperwork that matches reality. You don’t need a mountain of documents, but you do need a clean trail from your asset system to the final disposition. The best records read like a story with no missing pages.
Start by keeping a consistent set of core documents for each disposal event:
- Asset list tied to your inventory: Device type, make/model, serial number, asset tag, department, and location.
- Release approval or ticket: Who authorized removal from service, and why (refresh, failure, end-of-lease).
- Pickup record: Date/time, quantity, sealed container count (if used), and who handed it off.
- Transport or custody log: Carrier, tracking numbers, route notes, and receiving confirmation at the facility.
- Sanitization report (when wiping is used): Method, tool or process name, pass/fail results, and any exceptions.
- Destruction report (when shredding or crushing is used): Media type, destruction method, and batch identifiers.
- Certificate of Destruction (CoD): Issued when physical destruction is the final method.
A strong certificate is specific enough that you can point to one device and defend what happened to it. Look for these elements:
- Who: Vendor legal name, facility location, and the responsible party (name, initials, or employee ID).
- What: Asset tag and serial number, plus media type (HDD, SSD, tape, copier drive).
- When and where: Pickup date, processing date, and destruction site.
- How: Sanitization standard or destruction method (for example, degauss, shred, crush), plus batch or job number.
- Proof markers: Signatures or unique identifiers, and any witness or QA step the vendor uses.
Retention should match your internal compliance expectations. Many teams keep disposal records for years because they support incident response, audits, and vendor reviews. Whatever window you choose, apply it consistently.
Most importantly, connect the dots. Tie every CoD or wipe report back to:
- The service ticket that initiated disposal
- The asset record in your CMMS or inventory tool
- The pickup and custody documents for that batch
Auditors don’t just want a certificate, they want traceability. If a serial number can’t be traced from closet to recycler to final outcome, the file won’t hold up.
When you review vendors, ask for sample reports before you sign. If their paperwork can’t map to your asset list cleanly, your audit prep will turn into a scramble later.
Wipe or destroy, a simple decision tree for secure medical device data disposal
When a device leaves service, you usually have two safe end states, verified wiping or verified destruction. The best choice depends on risk, the type of storage, and how fast you need the device off your floor. This quick decision tree helps an IT director and compliance manager reduce exposure, meet policy, and keep usable gear in circulation when it makes sense.
Use this as a practical checkpoint before anything goes to resale, donation, storage, or recycling:
- Can you identify the device and its storage media? If you can’t confirm model, storage type, or history, choose destruction.
- Can you wipe it using a recognized method and verify the result per asset? If yes, wiping can be defensible. If no, destroy.
- Did any part of the wipe fail (or is the media not wipe-friendly)? Any failure triggers destruction.
Think of this as your medical device data destruction guide in miniature: keep the decision simple, then prove the outcome with records.
When data wiping is the right move, and how to validate it
Wiping makes sense when you want to keep equipment useful without keeping risk. Common examples include redeploying a workstation to a different department, donating devices with written approval, returning equipment to a less sensitive role (for example, training lab use), or reselling surplus gear through an approved channel. In each case, you are not guessing, you are sanitizing and verifying.
A wipe is defensible when you can show three things: the method, the result, and the exception path. Start by using recognized sanitization methods that match your internal policy and the media type. Then validate completion with a pass result that ties back to a specific asset tag and serial number.
To keep it clean and auditable, your wipe workflow should include:
- A known standard or method name in the report (not just “erased”).
- Verification that the wipe completed successfully, recorded per device.
- Exception handling for anything that fails, including “partial wipes” and media errors.
- Clear documentation in your ticketing or asset system, so the wipe report is easy to retrieve later.
Storage type changes the playbook. Traditional hard drives often wipe predictably. SSDs can behave differently because of wear leveling, so your method has to match the drive technology. Self-encrypting drives (SEDs) may support a secure crypto-erase, but you still need proof it ran and completed. Meanwhile, some medical devices use soldered storage or hidden embedded memory, where standard tools cannot reach everything.
If you hit any of these red flags, move straight to destruction:
- The drive won’t complete a wipe, even after retries.
- You can’t access the media because of firmware locks or proprietary service menus.
- The device has mixed storage you can’t fully account for.
- The wipe report can’t tie back to that exact device.
A wipe only helps if you can prove it finished. If your documentation is thin, the risk stays thick.
When physical destruction is safer, required, or just faster
Destruction is the safer choice when uncertainty is high or time is tight. It also fits situations where policy, vendor contracts, or internal risk rules require a hard stop. If you have failed drives, an unknown device history, or media from high-sensitivity units (behavioral health, oncology, pediatrics, executive clinics), physical destruction avoids “what if” conversations later.
It can also be the quickest path during urgent decommissioning, such as a site closure, an unplanned refresh, or a compromised storage area. Similarly, end-of-life media like aging backup tapes and brittle drives often isn’t worth the effort to sanitize and re-test.
Common triggers that should push you to destroy:
- The device fails diagnostics, won’t power on, or throws SMART/media errors.
- You can’t verify prior custody (found in a closet, transferred between sites, or returned without paperwork).
- The asset type has a history of hidden storage (some copiers, imaging consoles, clinical carts).
- Your policy mandates destruction for certain categories, regardless of reuse value.
Destruction methods vary by media type, but the goal stays the same: make recovery impractical. At a high level, you’ll typically see:
- Shredding: Reduces drives and media to small pieces, often the default for mixed loads.
- Crushing or punching: Physically damages platters or chips to prevent readable recovery.
- Degaussing (where appropriate): Works for some magnetic media, but it’s not a fit for SSDs and many modern devices.
No matter the method, treat chain of custody like a medication handoff. A gap in the log creates doubt, and doubt is what audits and incident reviews feed on. Require an unbroken custody trail, and when destruction is used, insist on a Certificate of Destruction that lists each asset (or clearly references a batch with traceable IDs). In Washington State healthcare facilities, that paperwork is often the difference between “we think it’s handled” and “we can prove it.”
Washington State rules, environmental responsibilities, and how to choose a partner you can trust
In healthcare, disposal is never just getting rid of old gear. You’re managing patient privacy, regulated waste streams, and the real chance that materials get mishandled after they leave your dock. Done right, healthcare e-waste disposal Washington State stays compliant, reduces environmental harm, and gives you documentation that stands up to audits.
What Washington teams should plan for, from banned landfill items to downstream accountability
Washington expects electronics to move through proper reuse and recycling channels, not the trash. In other words, many items that look harmless (computers, monitors, printers, network gear, TVs, and devices with circuit boards) contain materials that require controlled handling. Add in batteries, lamps, and some older components, and you’ve got waste that doesn’t belong in a dumpster.
Start planning with two realities in mind:
- Rules vary by location. State guidance matters, and so do local county and city requirements for drop-off, packaging, and transport. Always confirm the latest requirements with the Washington State Department of Ecology and your local solid waste authority before a large pickup.
- You still own the outcome. Even when a vendor takes possession, your organization can still face risk if equipment gets exported improperly, dumped, or processed in a way that violates your standards or contract terms.
That’s why downstream transparency matters. A “mystery broker” might take your pallets, then sell them through multiple hands. Every extra handoff is another chance for PHI exposure and environmental problems.
Look for partners who can explain, in plain language, where devices go next: what gets refurbished, what gets parted out, and what gets shredded and recycled. Ask for a clear description of their downstream network and how they audit it. If the answer is fuzzy, treat it as a red flag.
If a vendor can’t clearly explain the next stop for your equipment, you can’t prove responsible recycling or control risk.
Vendor vetting checklist for healthcare, questions to ask before you sign
A good recycler protects privacy like it’s part of your compliance team. Before you sign, vet them the same way you’d vet any high-risk vendor, because that’s what they are once they touch devices that may contain PHI.
Use this checklist to guide your review, then ask for proof (sample reports, policies, and process walkthroughs):
- HIPAA-aware process: Will they sign a BAA when PHI exposure is possible, and do their staff receive HIPAA training tied to device handling?
- Secure transport: Do they use locked vehicles, sealed containers, tracked routes, and documented handoffs at pickup?
- Controlled-access facility: Are receiving areas monitored, access limited, and staging areas secured to prevent walk-offs?
- Documented sanitization and destruction: Do they specify wipe methods, exception handling, and destruction methods by media type?
- Certificates and reporting: Can they provide serial-level reporting, Certificates of Destruction (when used), and summary reports for compliance?
- Incident response plan: What happens if a pallet goes missing or a seal breaks, and how fast will they notify you?
- Insurance coverage: Ask about general liability, cyber coverage (if offered), and cargo coverage for transport risk.
- Employee screening: Do they run background checks for staff with access to your assets?
- Chain of custody: Can they show a complete custody trail from pickup to final processing, with timestamps and signatures or equivalents?
A few practical questions will quickly separate “recycler” from “trusted partner”:
- Can you handle mixed loads (IT gear plus clinical devices, copiers, and media) under one chain of custody?
- Can you support multi-site pickups across Seattle, Tacoma, and Bellevue, with consistent paperwork at each site?
- Do you provide reporting that maps cleanly to our asset system (asset tag, serial, location, disposition, and date)?
If the vendor can’t match your inventory records to their final reports, the process will break when you need it most, during an audit or an incident review.
A year-round program that works, plus Living Green Technology’s secure end-to-end process
One big cleanout helps, but it doesn’t solve the real issue. Devices retire all year, across clinics, floors, and storage rooms. A year-round program keeps PHI risk low, reduces clutter, and makes audits less stressful because your records stay current.
The goal is simple: treat e-waste like any other controlled workflow. You want clear rules, a consistent intake path, and proof of what happened to each device.
Build a repeatable workflow, from inventory to pickup to final reporting
Start with a written disposal policy that people can follow on a busy day. Keep it short, and make it clear who approves retirement, who handles storage, and what “done” looks like (wipe report or Certificate of Destruction, plus final disposition in your asset system). Then assign roles so nothing sits in limbo.
A basic, repeatable program usually looks like this:
- Set the policy and roles: IT sets the technical rules, Compliance sets record needs, Facilities controls storage areas, and site managers own local follow-through.
- Label and segregate devices: Use simple tags like “Hold for wipe,” “Destroy media,” and “Unknown, destroy.” Keep e-waste separate from donations and surplus furniture.
- Maintain an asset and media inventory: Track asset tag, serial, site, department, and storage type (HDD, SSD, tape, embedded). Add a “custody status” field so you can see where it sits today.
- Schedule routine pickups: Put pickups on a calendar (monthly or quarterly), so closets don’t become long-term storage.
- Define wipe vs destroy rules: Decide in advance what gets wiped, what gets destroyed, and what triggers exceptions (failed drives, unknown history, high-risk departments).
- Store records in one place: Keep pickup logs, wipe results, CoDs, and final reports in a single folder system tied to your ticket number.
To cut chaos, add a few physical controls that work across multiple sites:
- Use locked collection carts or a locked cage near IT or Receiving, not an open hallway corner.
- Run quarterly cleanouts by site, even if you do monthly pickups for high-volume locations.
- Require one single intake form for every clinic, so staff stop writing notes on sticky labels.
Training matters because the first person who touches a retired device often isn’t IT. Teach staff how to tag devices, where to put them, and what never goes in the bin (loose drives, tapes, and anything labeled “unknown”). Also plan for urgent decommissions, like a sudden lease return or a clinic closure, with a fast approval path and a same-week pickup option.
If you standardize intake and labeling, everything after that gets easier, including reporting and audits.
How Living Green Technology helps Washington healthcare teams stay secure and audit-ready
Once a device leaves your building, vendor risk becomes your risk. That’s why many teams choose a partner that can handle pickup, custody, data security, and reporting without constant follow-up. Living Green Technology (LGT) supports Washington healthcare organizations with a secure, end to end process built for busy IT and compliance teams.
Here’s what that looks like in plain language:
- Coordinated pickup and drop-off options: You can schedule onsite pickups across clinics, hospitals, and admin sites. If you prefer, arranged drop-off can also work for small batches.
- Secure transport and documented handoff: Devices move under controlled custody, with clear handoff records so you can show who had what, and when.
- Controlled processing: Equipment gets received and handled in a managed environment, reducing the chance of mix-ups and missing items.
- Documented data wiping or physical destruction: LGT supports verified outcomes, whether you need sanitization with reporting or physical destruction for sensitive or failed media.
- Certificates and detailed reports: You get documentation that supports audits, including certificates (when destruction is used) and reporting that helps match outcomes to your inventory.
- Responsible recycling: Materials move through proper recycling channels, helping you meet environmental responsibilities without losing control of the process.
The main win is time. Instead of chasing emails, reconciling partial spreadsheets, or explaining gaps during an audit, your team gets a clear paper trail tied to each pickup. That also helps reduce vendor sprawl because you’re not juggling a separate hauler, a separate shred vendor, and a separate recycler.
If you want a program that stays consistent across locations, Contact Living Green Technology for a site-specific plan and scheduling that fits your pickup volume, storage limits, and HIPAA documentation needs.
Conclusion
Healthcare e-waste disposal in Washington State works best when you treat every retired device like it could hold PHI until you prove otherwise. Start by knowing what’s in scope, then use a simple wipe vs destruction decision tree, so nothing slips through on guesswork. Just as important, keep traceable documentation, especially wipe reports and Certificates of Destruction, because an audit cares about proof as much as process.
Washington also expects responsible recycling, so choose a partner who can explain where your equipment goes after pickup and back it up with records. Finally, run this as a year-round program, not a once-a-year purge, because steady pickups and consistent paperwork reduce risk and stress.
Ready to lock this down across sites? Contact Living Green Technology to set up a secure healthcare e-waste disposal plan in Washington State, with custody controls and reporting your compliance team can stand behind.