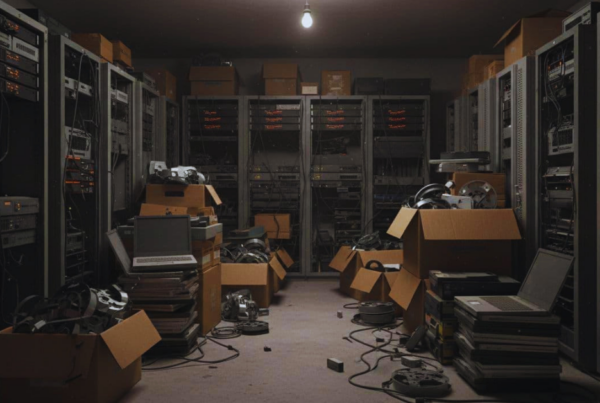


Store closures and remodels move fast. One day, the registers are ringing, the next day there’s a dumpster out back and a demo crew waiting on keys. In that rush, retail tech gets left behind, tossed in the wrong bin, or handed to the wrong person.
That’s risky for two reasons. First, you have to protect customer and business data, especially on POS and payment devices. Second, you need to keep electronics and batteries out of the trash, because the rules are real and the safety issues are bigger than most teams expect.
In Washington, many electronics have been banned from landfill disposal for years. Seattle goes further, it also blocks batteries and many battery-containing items from garbage because of fire risk. The checklist below is built for managers and ops teams who need a clear plan, not a long policy memo.
Know what you must not throw away in Seattle, Bellevue, Tacoma, and Washington State
Closures and remodels create “last day” chaos. Someone unplugs the router, someone else clears the office, and a third person starts filling a dumpster. That’s exactly when compliance mistakes happen.
Washington’s electronics rules matter because they apply even when you’re under a deadline. The state has a long-running ban on putting many covered electronics (often called covered electronic products) in the trash or landfill. If you’re unsure what’s covered, treat common screens and computing devices as restricted until confirmed. You can read the legal language in the state code at Washington’s electronic product recycling law.
Seattle adds another layer. Since January 1, 2024, Seattle Public Utilities has banned batteries and certain electronics from garbage and recycling carts, mainly due to fires in trucks and facilities and the hazards inside batteries. SPU summarizes the rule and what’s included on its page about the Seattle ban on batteries and electronics in garbage.
What happens when a team breaks these rules? Sometimes the problem shows up as a tagged container, a rejected load, extra handling fees, or a painful call from the property manager. In other cases, the first sign is worse, like a battery incident in a compactor area. The safer path is simple: use responsible recycling, keep batteries out of dumpsters, and document where the equipment went.
Quick way to tell if something is covered e-waste or a battery item
Use this quick decision guide when you’re walking the store with a cart and a label maker:
If it has a screen and it looks like a computer, treat it like covered e-waste until you confirm otherwise. That usually includes monitors, laptops, tablets, e-readers, and many back-office PCs. If it has any battery (rechargeable or removable), assume it needs special handling and separate staging.
The tricky part is the “in-between” devices that don’t look like computers at first glance. Retail stores have a lot of them:
- Handheld scanners and mobile computers
- Payment pin pads and handheld card readers
- Tablets used as POS or queue devices
- Battery backup units (UPS) and battery packs
- Cordless phones and headsets
- Smart locks and electronic keys
- Electronic shelf labels and their charging cradles
Treat these like a bag of loose matches. They’re safe when handled right, and a problem when they’re crushed, punctured, or tossed in a dumpster.
Special risk areas: POS and payment devices
POS gear is different from “just old electronics.” Even when your sales system is cloud-based, local devices can still store sensitive information. That can include transaction logs, error files, tokens, device IDs, Wi-Fi credentials, VPN settings, and sometimes customer details, depending on the setup.
Payment security expectations also matter. Most organizations need to prove they protected data during equipment retirement. That’s why POS system disposal Washington teams should plan for secure data destruction before recycling, not as an afterthought.
A good rule: if a device ever touched payment data or admin passwords, handle it like evidence. Control access, track handoffs, and keep proof of destruction.
The closure and remodel device checklist, so nothing gets missed
Think of a retail closeout like cleaning out a house after a storm. You don’t start by guessing what’s valuable. You start by making a room-by-room list, then you decide what to keep, donate, or throw away. Tech should work the same way.
For teams searching for retail store closure electronics disposal Seattle, store remodel tech recycling, or POS system disposal Washington, the biggest win is a tight inventory process that doesn’t depend on memory.
Before you unplug anything, assign one accountable owner. That person doesn’t have to do all the labor, but they do own the list. Next, tag items as you touch them, snap photos of model and serial labels, and record where each asset ends up: reuse, return, recycle, or destroy.
Here’s a simple zone-based inventory you can print and walk with:
| Store zone | What to look for | Why it gets missed |
| Front of house | Registers, tablets, pin pads, receipt printers, kiosks, signage players | Removed late, mixed with fixtures |
| Manager area | Laptops, tablets, docking stations, phones, safes with smart locks | Packed into “office” boxes |
| Back office | Desktops, external drives, label printers, time clocks | Stashed in drawers and cabinets |
| Network closet | Router, switch, firewall, modem, Wi-Fi APs, UPS | Hidden behind panels and cables |
| Stockroom/warehouse | RF scanners, charging racks, spare tablets, old monitors | Stored as “backups” |
The takeaway: if you don’t inventory by zone, you’ll miss a whole category. Most misses happen in the network closet and stockroom, not at the registers.
Front of house tech: lanes, kiosks, and customer devices
This is where teams move fast, because it’s visible and tied to the last day of sales. Still, the front end is full of small data-bearing parts.
Use this as your front-of-house sweep:
- POS terminals and all-in-one registers
- iPads or Android tablets used for checkout or line-busting
- Pin pads, card readers, and contactless readers
- Receipt printers and kitchen printers (for food concepts)
- Cash drawers with smart locks or electronic keys
- Self-checkout components (scanner units, controller boxes)
- Kiosks and price checkers
- Digital signage media players (often tucked behind screens)
- Store phones, headsets, and queue management tablets
- Cameras near checkout (and the small recording unit they connect to)
Also, pull removable media before equipment leaves the building. SD cards, SIM cards, and USB sticks can sit inside devices for years. Bag them, label them, and store them like you would store keys.
Back office and network closet: the stuff that holds the keys
If the front of house is the cash register, the back office is the filing cabinet. The network closet is the key ring.
Back-office systems often contain employee data, vendor contracts, and saved passwords. Meanwhile, network gear can hold admin credentials, Wi-Fi keys, VPN profiles, and logs. Camera systems can store video that’s sensitive during a claim or dispute.
Washington’s Department of Ecology offers practical guidance on common e-waste and safer recycling, see Washington Ecology’s electronic waste guidance.
When you do your sweep, look for:
- Desktops, laptops, mini PCs, and thin clients
- Servers, NAS devices, and external hard drives
- USB drives, memory cards, and backup media
- Routers, switches, firewalls, and modems
- Wi-Fi access points and controller devices
- Patch panels and telecom gear
- Time clocks, alarm panels, and access control boxes
- DVRs or NVRs for camera systems
- UPS battery backups (these are both e-waste and battery risk)
Treat these items with a chain-of-custody mindset. Lock them up until pickup. Limit who can handle them. Write down every handoff.
A step-by-step process for secure data removal and documentation
Under time pressure, teams make bad decisions for good reasons. They’re trying to hit the deadline. A simple workflow keeps you moving without losing control.
- Sort by outcome (reuse, return to vendor, donate, recycle, destroy).
- Identify data-bearing devices (anything with storage, even small players and DVRs).
- Choose wipe vs destroy based on risk and whether the device will be reused.
- Stage securely (locked room or caged area, labeled pallets, batteries separated).
- Document every move (photos, serial numbers, who handled it, where it went).
- Collect certificates and reports and file them with the closure paperwork.
This process also helps with landlord questions and internal audits. When someone asks, “Where did the routers go?” you’ll have an answer that’s more solid than, “I think we recycled them.”
Wipe, destroy, or both: choosing the right method
Wiping can be enough when you plan to redeploy company-owned devices and the drives are healthy. Still, you need to use a recognized method and verify the wipe. Don’t rely on a factory reset for sensitive systems, especially POS, payment, and network gear.
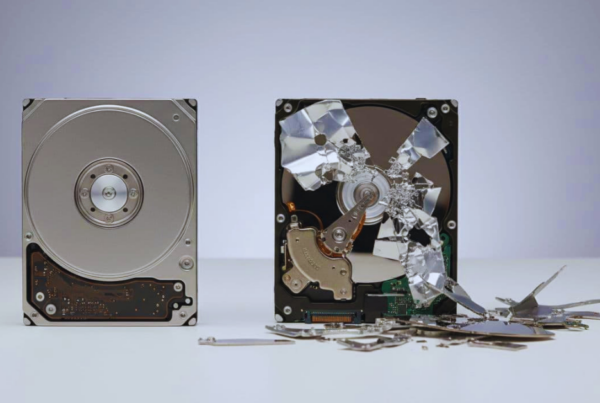
Destruction is often the safer call when drives fail, devices are unknown, or the gear handled payments. In closures, the biggest risk comes from “mystery” devices that no one wants to own. If you can’t confidently confirm what’s on it, destroy the storage and keep proof.
Onsite services can reduce chain-of-custody risk. Offsite services can work too, as long as the provider controls transport and gives documentation.
Paperwork to ask for from vendors and recyclers
Ask for paperwork before pickup day, not after the truck leaves. If the vendor can’t provide documentation, treat that as a warning sign.
Keep this request list short and clear:
- Certificate of Data Destruction (or Certificate of Destruction for media)
- Recycling certificate showing responsible processing
- Downstream statement describing where materials go
- Itemized asset report with serial numbers (when available)
- Weight tickets for the load (helpful for internal reporting)
- Vendor return proof for leased devices (RMA, shipping receipts, tracking)
- No landfill dumping confirmation when the provider offers it
Third-party summaries can also help you compare programs. For example, ERI’s overview of Washington e-waste legislation gives useful context on how the state program is structured.
Scheduling pickup and keeping gear out of landfills during the move-out
The most common failure point is timing. If demolition starts at 7 a.m. and the recycling pickup is “sometime next week,” the dumpster becomes the default plan.
Instead, schedule your pickup to land before fixtures come out and before contractors start clearing rooms. Create one staging area, then stage by category: data devices, non-data electronics, and batteries. That keeps the move-out clean and reduces mix-ups.
If you’re coordinating a store closure or remodel in the Seattle area, line up a business pickup with a provider that can handle inventory support and data destruction documentation. Living Green Technology offers business services and pickup scheduling details on its business electronics recycling page.
Primary call to action: Download the checklist and contact LGT to coordinate your store’s tech cleanout. It’s the easiest way to keep the closeout binder complete and avoid last-minute surprises.
How to stage e-waste safely on-site until pickup day
Staging is where safety and security meet. The goal is to prevent theft, damage, and battery incidents.
Keep items indoors when you can. Shrink-wrap pallets. Lock up anything with storage. If you have loose lithium batteries, tape terminals when needed and store them in a way that prevents crushing. Also, avoid stacking monitors in unstable piles, because cracked screens create a different mess.
Set aside one bin for cables and small adapters, because they multiply fast. At the same time, don’t let that bin turn into a “junk” bin where batteries disappear.
Reminder for move-out crews: don’t put batteries or covered electronics in dumpsters, even for “just one load.” One mistake can hold up the whole haul.
Pickup planning with Living Green Technology and other Seattle area options
When you schedule a pickup, have a few details ready: device types, estimated counts, whether there’s a loading dock, elevator limits, parking rules, and your demolition date. That helps avoid reschedules.
Also confirm what services you need. Some projects only require responsible recycling. Others need chain-of-custody, drive shredding, or itemized asset reports. Living Green Technology lists service options like recycling and data destruction on its electronics recycling services page.
For smaller quantities or special cases, some teams also use established local drop-off and reuse options. REPC has long operated in Seattle, and its Seattle electronics recycling location information can be helpful when you need another point of reference. Closures usually benefit from pickup, though, because you get speed, control, and cleaner documentation.
Conclusion
Closures and remodels don’t fail because people don’t care. They fail because the clock runs out. A responsible plan fixes that by doing four things well: inventory every device, secure data before anything leaves the site, follow Seattle and Washington disposal rules, and schedule certified recycling so tech stays out of landfills.
Print the checklist for the closure binder, assign one accountable lead, and save certificates and serial-number reports for audits and future questions. Then take the next step: download the checklist and contact LGT to coordinate your store’s tech cleanout so the last day doesn’t turn into a compliance headache.